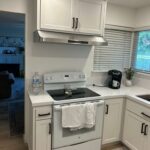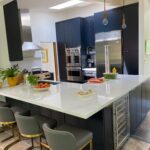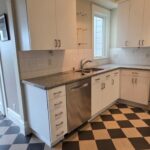

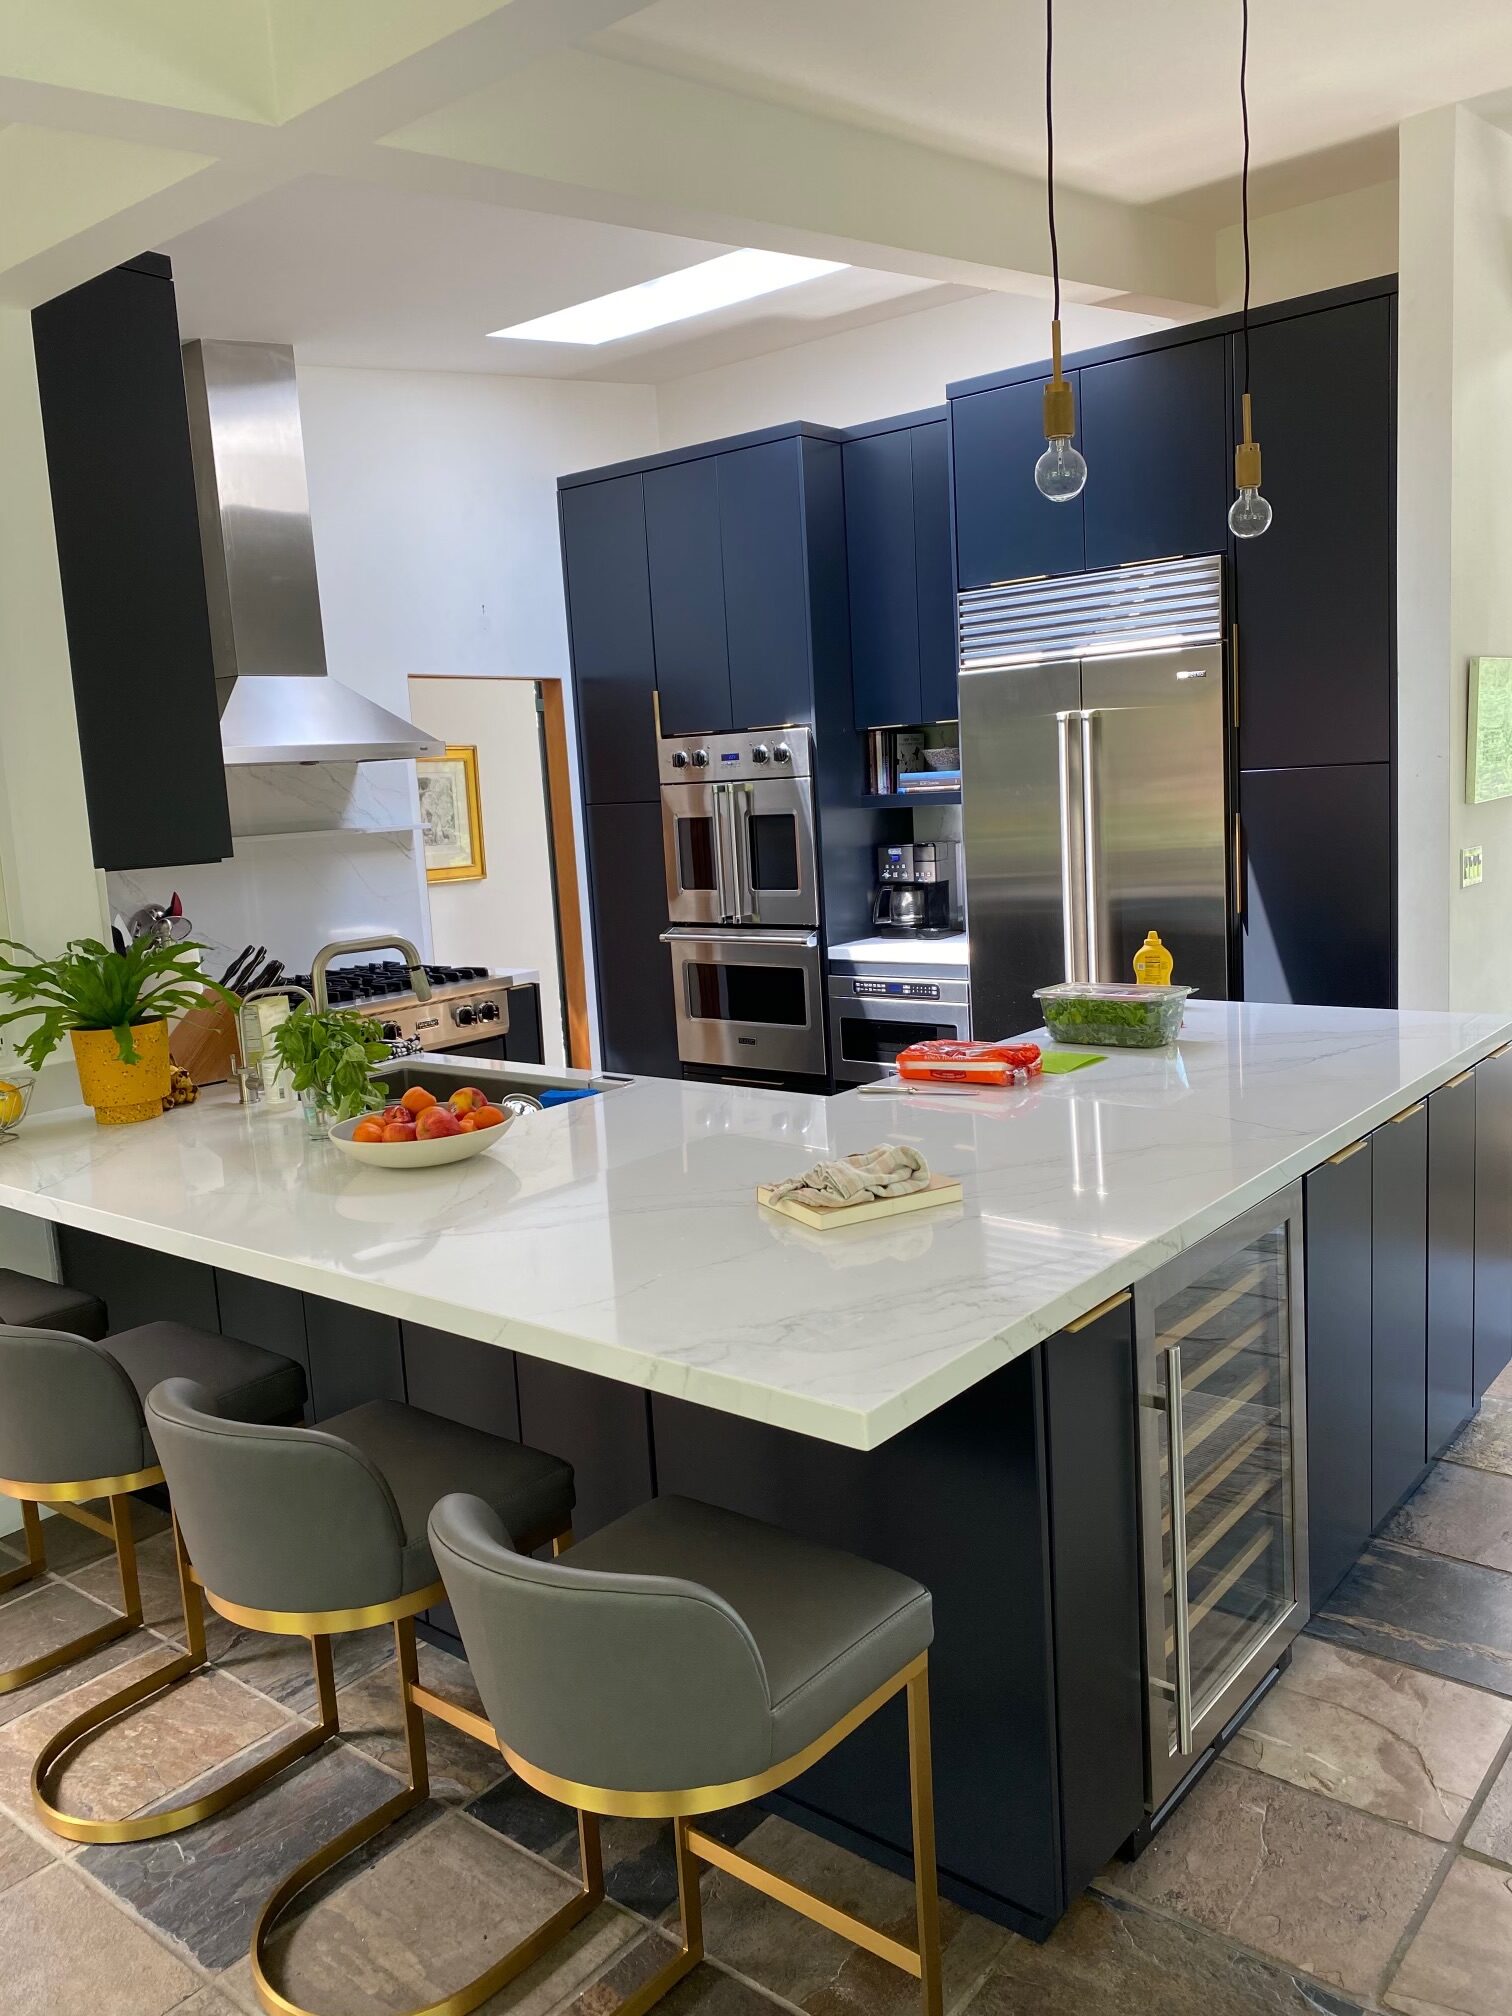
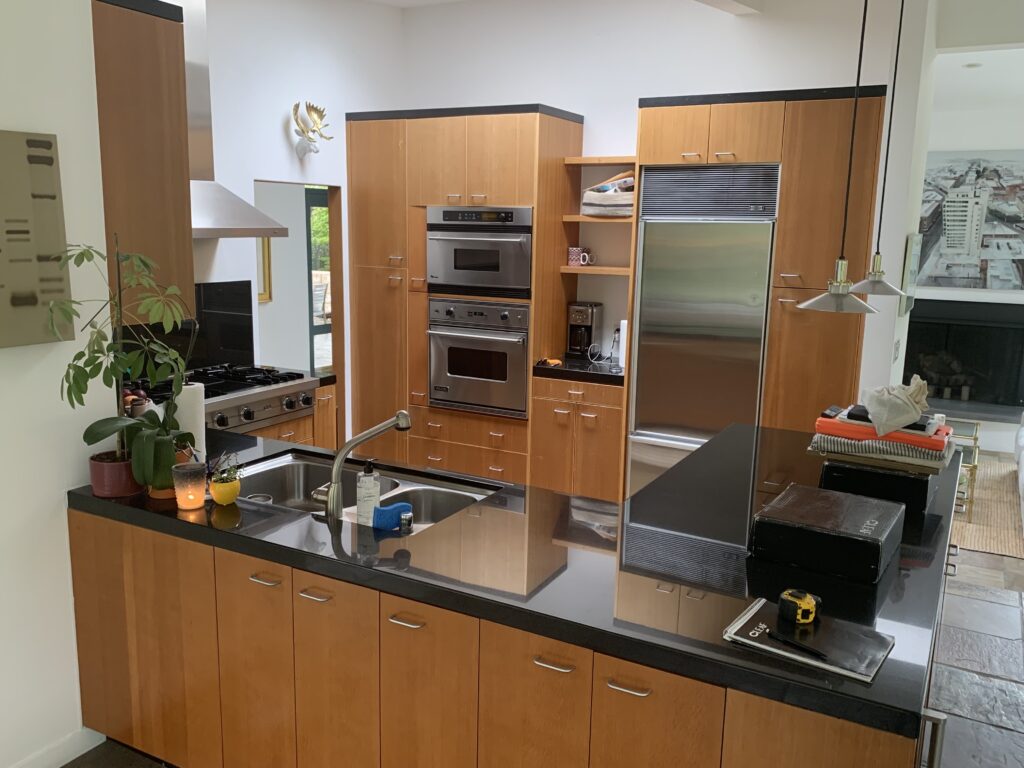
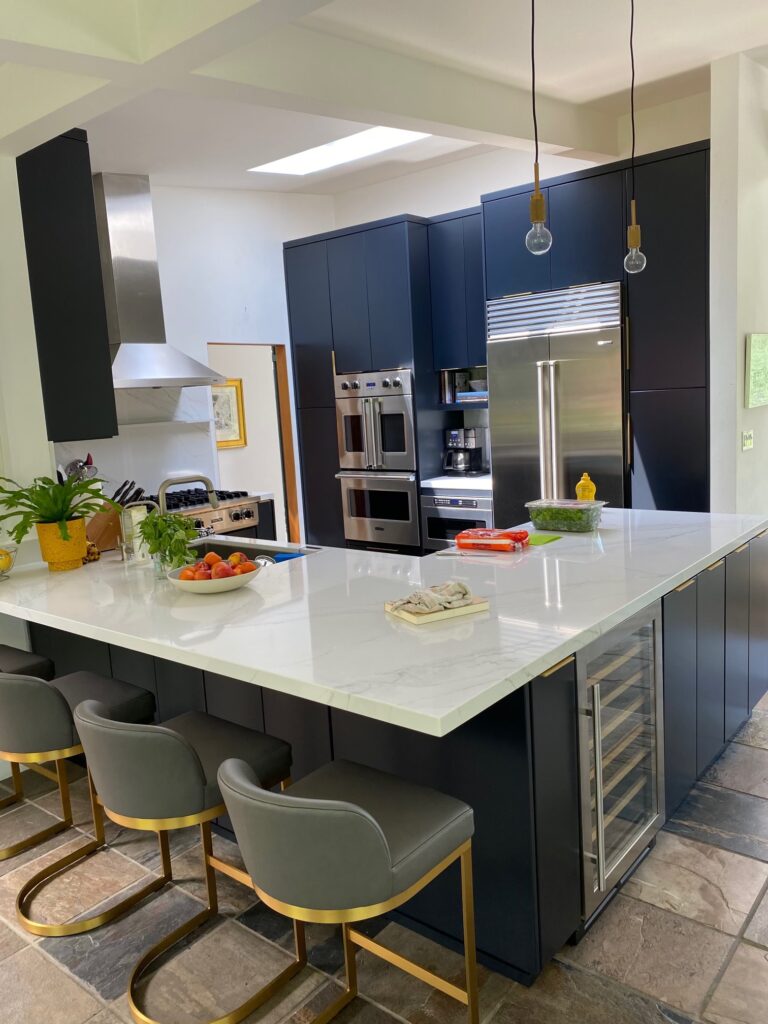
Take a look at this kitchen. Modern cabinets. Clean countertops. A backsplash that pulls everything together. Most people who see it assume it’s the result of a full kitchen remodel — walls opened, cabinets ripped out, weeks of construction, six figures spent.
The cabinets in the “after” photo are the same cabinets as the “before.” Same boxes. Same hinges. Same layout. Same kitchen. What changed: a professional cabinet painting process, new quartz countertops, and a thoughtful backsplash. The structural bones of the kitchen were never touched.
This is the part of kitchen remodeling that most homeowners don’t realize exists. There’s a wide middle ground between “live with the kitchen I’m tired of” and “tear it all out and spend $80,000.” That middle ground, done right, produces results that are genuinely indistinguishable from a full remodel — at roughly half the cost, in about a week instead of three months, without the dust, demolition, or temporary kitchen-in-the-garage situation.
The problem is that doing it wrong — which mostly means DIY shortcuts or hiring a general handyman who doesn’t specialize in cabinet finishes — produces a kitchen that looks worse than where you started, and that often costs more in the long run to fix than just hiring a professional in the first place.
This guide walks through exactly when cabinet painting is the right choice, when it isn’t, what the professional process actually looks like step by step, why DIY almost always disappoints (with the chemistry of why), how to choose colors and materials that won’t look dated in five years, and how to think about the decision if you’re a Bay Area homeowner staring at a kitchen that’s lost its spark.
What’s In This Guide
- Why So Many Bay Area Kitchens Need Help — But Not a Full Remodel
- Cabinet Painting vs Kitchen Remodel: An Honest Side-by-Side
- Is Cabinet Painting Right for Your Kitchen? (Diagnostic Checklist)
- Painting vs Refinishing vs Refacing: What’s the Real Difference?
- What Professional Cabinet Painting Actually Looks Like (12 Steps)
- Why DIY Cabinet Painting Almost Always Fails (The Real Chemistry)
- The Magic Combination: Painting + Countertops + Backsplash
- Choosing Materials: Colors, Finishes & Hardware
- Cost, Timeline & What to Expect
- Frequently Asked Questions
Why So Many Bay Area Kitchens Need Help — But Not a Full Remodel
If your kitchen was built between roughly 1995 and 2015, there’s a good chance it’s caught in a very specific kind of design limbo. It’s not old enough to be charming or vintage. It’s not new enough to feel current. And critically — it’s probably built better than anything you’d buy off the shelf today.
Here’s why that matters. Kitchens from this era share a few traits:
- Solid plywood or solid wood cabinet boxes. Modern stock cabinetry often uses thinner MDF or particle board with veneer. The construction quality of a typical 2005 cabinet is, ironically, often higher than what you’d get from a budget remodel today.
- Real wood doors — usually oak, maple, cherry, or alder. These doors are heavy, well-built, and structurally good for another 30+ years if maintained.
- Considered layouts. Pre-open-concept era kitchens often have better work triangles, more storage, and more usable counter space than the trendy “kitchen island with no surrounding cabinets” designs that came later.
- Quality hinges and slides — usually concealed hinges and metal drawer glides that still work fine, even if they’re not soft-close.
So what’s the problem? Almost entirely cosmetic:
- The wood finish is dated. Honey oak, golden cherry, and warm maple finishes that were sophisticated in 2005–2010 read as “old” to a 2026 eye. The orange undertones especially clash with the cool greys and whites that dominate current design language.
- The countertops have aged poorly. Tile counters with grout lines, busy granite slabs with lots of movement, and dated laminate patterns date a kitchen instantly. Even neutral granites from this era often have a yellow or peach undertone that fights with contemporary finishes.
- Hardware shows the era. Brushed nickel cup pulls, ornate scrolled handles, and small round knobs all telegraph “this is a 2005 kitchen” to anyone who looks at them.
- Tile backsplashes are too busy or too small. 1×1 mosaic backsplashes, tumbled stone medallions, and tiny accent tiles all date a kitchen.
The homeowner’s instinct is to assume that fixing all this requires tearing the kitchen out and starting from scratch. After all, HGTV demolition montages have trained everyone to think that real renovation involves sledgehammers. But sledgehammers are rarely what your kitchen actually needs.
The smarter question is: which elements of my kitchen are actually broken, and which are just visually dated? If the answer is “visually dated,” paint and surface updates do the work — and the cabinet boxes you already paid for stay where they are.
Cabinet Painting vs Kitchen Remodel: An Honest Side-by-Side
Let’s put the two side by side. This isn’t sales material — these are the actual tradeoffs, including where a full remodel genuinely wins. The right choice depends on your situation, not on which option happens to be more profitable for a contractor.
| Factor | Cabinet Painting | Full Kitchen Remodel |
|---|---|---|
| Typical investment | Up to 50% less | Full investment |
| Timeline (start to finish) | About a week | 6–12 weeks |
| Kitchen unusable during work | Mostly usable | Weeks of no kitchen |
| Visual transformation | Dramatic | Dramatic |
| Change layout / move walls | ❌ No | ✅ Yes |
| Replace cabinet boxes | ❌ No | ✅ Yes |
| Move plumbing / gas / electrical | ❌ No | ✅ Yes |
| Replace countertops & backsplash | ✅ Yes | ✅ Yes |
| Replace appliances | Optional | Usually yes |
| Add new lighting / electrical | Limited | ✅ Yes |
| Dust & disruption | Minimal (contained) | Significant |
| Requires permits | Usually no | Often yes |
| Resale impact | Strong positive | Strong positive |
| Best for | Cosmetic refresh of working kitchen | Layout problems or failed cabinets |
The headline. A full kitchen remodel is the right choice when the layout doesn’t work for your daily life, when the cabinet boxes are damaged or made of failing particle board, when you want to move plumbing or knock down walls, or when the kitchen is functionally limiting how you live. For everyone else — and that’s most homeowners — cabinet painting combined with surface updates delivers 90% of the visual result for a fraction of the investment.
Put simply: if the only thing wrong with your kitchen is how it looks, the only thing you need to change is how it looks. You don’t need new plumbing to get a new kitchen. You don’t need to spend three months without a stove to feel proud of your space.
Is Cabinet Painting Right for Your Kitchen? (Diagnostic Checklist)
Cabinet painting only works when the underlying cabinets are worth saving. Before any contractor — including us — recommends painting your kitchen, the cabinets need to be evaluated honestly. Here’s how to do that yourself, before the consultation.
Step 1: Identify the cabinet material
Open a cabinet door and look at the inside edge where the door meets the box. You’re looking for three possibilities:
- Solid wood. Visible wood grain on the edge, often slightly different color than the visible surface. Heavy door when you lift it. Excellent candidate for painting.
- Plywood with veneer. Multiple thin horizontal layers visible on the edge (“laminations”). Sturdy, paintable, good candidate.
- Particle board / MDF. Uniform brown speckled or smooth surface on the edge, no grain. Can be painted if it’s in good condition, but won’t last as long as paint on wood. If the particle board is swollen, crumbling, or showing water damage, painting won’t help — these cabinets need to be replaced.
A quick test: tap the inside of the cabinet with your knuckle. Solid wood and plywood sound dense and slightly hollow. Particle board sounds dead and dull.
Step 2: Assess the cabinet box condition
Walk through each cabinet and look for:
- Square doors and drawers — close fully and align with neighboring doors without gaps
- Solid mounting — no boxes pulling away from the wall, no sagging shelves
- No water damage — especially in the cabinet under the sink. Black staining, bubbling, or soft spots mean trouble
- Working hinges — doors don’t sag or stick, no broken hinges
- Functional drawers — slides work, drawer fronts attached firmly
Minor issues (one loose hinge, one sticky drawer) are easily fixed during the painting project. Major issues (water-damaged sink cabinet, multiple sagging shelves, separating joints) need to be addressed first — and if multiple boxes are failing, painting may not be the right answer.
Step 3: Evaluate the door style
Cabinet painting changes color, not shape. Look at your cabinet door silhouette honestly:
- Shaker (flat panel with simple frame) — timeless, paints beautifully, works for any aesthetic
- Raised panel (traditional, slightly arched or stepped) — classic, paints well, reads more traditional
- Slab / flat (no detail) — modern, paints beautifully, works for contemporary designs
- Cathedral / ornate (heavily detailed, scrolled) — paints fine but the style is dated. If you hate the door shape, painting won’t fix that
- Glass insert / mullion — paints normally, glass cleans up separately
If you love the silhouette of your doors, painting is a strong fit. If you wish the doors looked completely different, you’re really a candidate for cabinet refacing — where the doors are replaced with new ones in the style you actually want.
Step 4: Evaluate the layout
Ask yourself, honestly:
- Does the sink need to move to a different location?
- Do you wish the kitchen opened into another room (knocking down a wall)?
- Do you want a different size or position of island?
- Are you constantly bumping into the same corner or running out of counter space?
If you answered yes to any of these, layout is your problem — not finishes. Paint will not fix layout. You need a kitchen remodel, not painting.
Step 5: Consider your timeline in the home
Painted cabinets done professionally hold up for 10+ years. If you’re planning to sell in the next 3–5 years, painting is an excellent ROI — buyers respond to modern kitchens, and the upgrade typically pays back significantly more than it costs at resale. If you’re staying long-term, you’ll enjoy the result for years. Either way, the math works.
The only case where painting doesn’t make sense is if you’re planning a full remodel within the next 1–2 years anyway. Don’t paint cabinets you plan to throw out.
Painting vs Refinishing vs Refacing: What’s the Real Difference?
These three terms get used interchangeably in marketing copy, but they’re different services for different problems. Picking the wrong one wastes money. Picking the right one delivers exactly what you want.
Cabinet Painting
What it is: The cabinets stay where they are. Doors and drawer fronts are removed, deep-cleaned, sanded, primed with a bonding primer designed for cabinets, then sprayed with multiple coats of high-quality cabinet paint in a controlled environment. Then reinstalled. The exposed sides of the cabinet boxes are also painted to match.
What changes: The color and finish of your cabinets — everything else stays.
Best for: Solid cabinet construction, door styles you like, kitchens where the only real problem is the wood color or worn finish. The most cost-effective path to a transformed kitchen.
What it can do: Take honey oak to crisp white. Take golden maple to deep navy. Take warm cherry to charcoal. The color change is dramatic.
What it can’t do: Change the shape of your doors. Hide damaged or particle board cabinets. Fix layout problems. Learn more about cabinet painting →
Cabinet Refinishing
What it is: Similar to painting, but instead of paint, the cabinets get a new stain finish. The wood grain remains visible, just in a different tone. The process involves stripping the original finish (more involved than painting prep), re-staining the wood, and applying clear protective top coats.
What changes: The tone of the wood — for example, honey oak refinished to walnut, or warm cherry refinished to a cooler espresso. The grain still shows through.
Best for: Solid wood cabinets (this won’t work on veneer or particle board) where you love the wood look but want a different tone. Homeowners who want to preserve the character and warmth of real wood rather than going to a painted look.
What it can do: Modernize a wood-look kitchen without losing the wood-look itself. Take orange-toned wood to a contemporary grey-walnut. Make existing wood feel current.
What it can’t do: Hide knots, grain imperfections, or wood character that you want gone (paint does that — refinishing showcases the grain). Work on veneer or particle board cabinets. Learn more about cabinet refinishing →
Cabinet Refacing
What it is: The cabinet boxes stay in place, but the doors and drawer fronts are replaced entirely with new ones in any style and finish you want. The exposed sides of the existing boxes are then covered with a matching veneer so everything coordinates. New hardware is typically part of the project.
What changes: Both the color and the style of the doors. The kitchen looks like it has all-new cabinets, even though the boxes are original.
Best for: Cabinet boxes in good condition where you want a completely different door style — going from raised-panel oak to shaker white, or from traditional cathedral doors to flat slab modern. Also a good answer for cabinets with cosmetically damaged or warped doors.
What it can do: Deliver a result functionally identical to new cabinets at roughly half the cost, in about a quarter of the time. Combine style change with color change. Add features like soft-close hinges or new drawer slides.
What it can’t do: Change cabinet layout. Fix structurally failing boxes. Reduce the cost as much as painting (because materials cost more). Learn more about cabinet refacing →
Quick decision tree:
- I like my doors, but the color is dated → Cabinet Painting
- I want to keep the wood look, but in a different tone → Cabinet Refinishing
- I want completely different doors (different style) → Cabinet Refacing
- I want a different kitchen layout → Full Kitchen Remodel
- My cabinets are falling apart → Full Kitchen Remodel or Cabinet Refacing (depending on box condition)
What Professional Cabinet Painting Actually Looks Like (12 Steps)
The reason professional cabinet painting produces a smooth, durable, factory-grade finish — and DIY almost never does — comes down to a process that’s more involved than most homeowners realize. Skipping any one of these steps causes the finish to fail. Here’s what’s actually happening behind the scenes.
1. Detailed inspection and prep planning
Before any work begins, we evaluate every cabinet in person. We’re checking material (solid wood vs plywood vs particle board), structural condition, any damage or wear that needs repair, and what hardware will be replaced or reused. This is also when we confirm color selection, finish sheen, and whether any features (soft-close hinges, new drawer slides, additional shelf supports) will be added to the project. Skipping inspection is how surprises happen mid-project.
2. Protection of the kitchen and adjacent rooms
Plastic sheeting is hung from ceiling to floor around the kitchen, sealed to walls with painter’s tape. Floors are covered with rosin paper or canvas drop cloths. Adjacent rooms get plastic on the doorways. HVAC vents in the work zone are sealed. This isn’t just for cleanliness — when paint is being sprayed, microscopic particles travel surprisingly far. Containment is what prevents your living room from getting a fine dusting of overspray.
3. Hardware and door removal (with labeling)
Every cabinet door, drawer front, and piece of hardware is removed. Each one is labeled — usually with masking tape and a numbered system — so it goes back exactly where it came from. This matters because doors that look identical are often slightly different (hinges adjusted over years, slight warping, minor differences in how they fit). Returning each door to its original opening is what keeps everything aligned at reinstallation.
The doors are then transported to a controlled workshop or staging area where they’ll be sprayed flat — this is the single biggest reason professional results outperform DIY. Doors painted while hanging on hinges will always have drip marks, run sags, and uneven corners. Flat spraying eliminates all of that.
4. Deep cleaning and degreasing
Kitchen cabinets accumulate years of airborne cooking oil, even when they look clean. Paint will not bond chemically to greasy surfaces — it will sit on top and peel within months. A commercial degreaser (typically a TSP substitute or specialized cabinet cleaner) is applied to every surface that will be painted, scrubbed in, and wiped off. Then the surfaces are wiped with clean water and allowed to dry completely. This single step is responsible for whether the paint lasts 10 years or 10 months.
5. Sanding for mechanical adhesion
Even after degreasing, paint needs a slightly roughened surface to grip. Every surface to be painted is sanded — usually with 220-grit sandpaper for a balance of profile and smoothness. Glossy original finishes especially need this step; paint applied directly to glossy surfaces will peel off in sheets within a year.
Sanding isn’t aggressive — we’re not trying to strip the old finish, just dull it enough for primer to grab. Power sanders are used where appropriate; tight corners and details are done by hand.
6. Filling, repair, and surface preparation
Dents, nail holes, edge wear, scratches, and any cosmetic damage are filled with wood filler or putty appropriate for the surface. Loose joints are re-glued and clamped. Damaged edges are repaired. Filled areas are then re-sanded smooth so they’re invisible after paint.
This is where DIY jobs reveal themselves to a trained eye. Any unfilled dent will show through paint mercilessly under kitchen lighting — and once paint is on, those imperfections are locked in.
7. Tack cloth and dust removal
After all sanding and filling is complete, every surface gets wiped with a tack cloth — a sticky cheesecloth-like material that picks up the finest dust particles. Any dust left on the surface will be permanently embedded in the first coat of primer and visible forever afterward as tiny bumps in the finish.
8. Bonding primer coat
A specialized bonding primer designed for cabinetry is sprayed on first. This is not the same as standard wall primer. Cabinet primers (common professional choices include shellac-based BIN, alkyd-based STIX, or specialty waterborne bonding primers) are formulated to grip difficult substrates — they bond to wood, slick veneer, even some metals. They also have stain-blocking properties that prevent wood tannins from bleeding through and yellowing the finish coats. After spraying, the primer is allowed to dry and then sanded lightly with very fine sandpaper to create the perfect surface for finish coats.
9. Multiple finish coats with HVLP spray equipment
Two to three coats of high-quality cabinet paint are sprayed using HVLP (High Volume Low Pressure) equipment. This isn’t optional — HVLP sprayers atomize the paint into a fine mist that levels into a glass-smooth surface as it cures. Brushes leave brush marks. Rollers leave roller texture. Aerosol cans leave inconsistent coverage. HVLP leaves a finish indistinguishable from factory cabinetry.
Between each coat, the surface is sanded with extra-fine paper (typically 320–400 grit) to remove any dust nibs and create perfect adhesion for the next coat. The paint itself is critical too — professional-grade cabinet enamels (popular choices include Benjamin Moore Advance, Sherwin Williams Emerald Urethane Trim Enamel, and BM Scuff-X) are specifically formulated to cure into a hard, durable surface. Wall paint will never become hard enough for kitchen use, no matter how long you wait.
10. Cure time in a controlled environment
Paint dries in hours, but cures over days or weeks. “Dry” means you can touch it without leaving fingerprints. “Cured” means it has chemically hardened to its full final durability. Doors and drawers are left flat in the controlled workshop environment to cure — out of dust, away from temperature swings, undisturbed. Skipping this step gives you cabinets that look fine on day one and start showing damage from light contact within months.
11. Reinstallation and hardware
Once cured, doors are reinstalled to their labeled original positions. Hinges are adjusted as needed for perfect alignment. New hardware (handles, knobs, pulls) is installed — typically with a careful template to ensure perfect spacing. If soft-close hinges or drawer slides are part of the upgrade, this is when they’re installed.
12. Final inspection and walkthrough
The painter walks every surface, checks every alignment, fixes any touch-ups, and then walks the kitchen with the homeowner. We review the finish, address any concerns, and explain how to care for the new cabinets. Then plastic comes down, the kitchen gets a final cleaning, and you have your new kitchen.
A typical professional cabinet painting project takes about a week from start to finish — but more importantly, the work behind that week is what produces a finish that lasts a decade.
Why DIY Cabinet Painting Almost Always Fails (The Real Chemistry)
Hardware stores sell “cabinet transformation kits” for $200–300 and YouTube is full of weekend DIY tutorials. The marketing implies anyone can do this in two days. We get called all the time to fix DIY cabinet painting that’s failed within months — sometimes within weeks. Here’s why it happens, in technical detail:
Failure 1: Peeling within months
What you see: Paint starts lifting from corners, around hardware holes, and along the edges of doors. It can be peeled off in sheets with a fingernail.
What actually happened: Adhesion failure. Paint never properly bonded to the underlying surface. Three causes:
- Inadequate degreasing. Cooking oil residue creates a chemical barrier between the surface and the primer. The paint can dry beautifully on top of the grease — and then peel right off because nothing’s actually bonding to wood.
- No sanding of glossy original finish. Modern factory cabinet finishes are smooth and chemically resistant by design. Paint has nothing to grab onto unless that surface is mechanically scuffed.
- Wrong primer. Standard wall primer is engineered for drywall. It doesn’t have the bonding chemistry needed for cabinet substrates.
The fix: Strip all the failing paint completely, then start over with proper prep. Often costs more than the original professional job would have.
Failure 2: Visible brush strokes and roller texture
What you see: Even from across the kitchen, you can see the lines from brush strokes or the orange-peel texture of roller marks. The doors don’t look like real cabinetry — they look painted.
What actually happened: Brushes and rollers physically cannot produce a smooth finish on cabinet doors. As paint dries, it doesn’t “self-level” enough to erase the texture from a brush or roller. Spray application (specifically HVLP) atomizes paint into a fine mist that lands and levels into a glass-smooth surface.
The fix: Sand the textured surface back down (extensive work), then spray-finish properly. At this point you’ve done all the labor of a professional job plus the DIY labor — for the same or worse result.
Failure 3: Tacky, gummy finish months later
What you see: Cabinet doors that feel slightly sticky to the touch even after weeks. Pots placed on shelves seem to leave marks. Tape used during the project pulled off paint when removed. Doors stick to frames when closed for a while.
What actually happened: The wrong paint was used. Wall paint, even high-quality wall paint, never cures hard enough for cabinet use. Cabinets require specialized cabinet enamels — typically waterborne alkyds or urethane-modified acrylics — that cross-link chemically into a hard, durable film. Standard latex wall paint stays softer indefinitely.
The fix: Strip and repaint with appropriate paint. There’s no chemical way to “harden” already-applied wall paint after the fact.
Failure 4: Drips, runs, and uneven coverage
What you see: Sagging drips on vertical surfaces of doors, especially around panel detail. Heavy paint buildup in corners. Thin coverage in other areas where the underlying color shows through.
What actually happened: Doors were painted while hanging on hinges. Gravity pulls wet paint downward — there’s no way around this physics. Professional painters remove doors and paint them flat for exactly this reason.
The fix: Sand drips smooth, repaint affected areas. The fix never quite looks as clean as if it had been done right the first time.
Failure 5: Yellowing or color shifting over time
What you see: White cabinets that were crisp white when painted now look cream or pale yellow within a year or two. Areas near the stove yellow faster than areas farther away.
What actually happened: Two possible causes. First, cheap white paints lack UV inhibitors and pigment stabilizers — they oxidize over time. Second, wood tannins (especially from oak, cherry, or pine) can bleed through paint that wasn’t stain-blocked with the right primer, and the bleed-through shows up as yellow staining. Heat near the stove accelerates both processes.
The fix: Strip the yellowed paint, re-prime with a proper stain-blocking primer, repaint with quality cabinet paint. Sometimes it requires two coats of stain-blocking primer for cabinets that bled badly.
The economics, honestly
A DIY cabinet paint job that fails after a year costs you:
- The original DIY materials investment (typically $300–800 for paint, primer, brushes, tape, supplies)
- 40–80 hours of your weekend labor
- The eventual professional job to fix it
- Extra labor to strip the failed paint (more than starting fresh from raw wood)
The “savings” of DIY frequently turn into 1.5× or 2× the cost of just hiring a professional in the first place — plus a year of looking at increasingly tired-looking cabinets while you decide what to do.
None of this is to discourage DIY-minded homeowners. There are plenty of home projects where DIY produces fantastic results. Cabinet painting is just particularly unforgiving — the visibility of kitchen cabinets means every imperfection is on permanent, well-lit display, and the chemistry of cabinet finishing is more demanding than most homeowners expect.
The Magic Combination: Painting + Countertops + Backsplash
The transformation in the before-and-after at the top of this post wasn’t cabinet painting alone. It was painting combined with two other surface updates that work in concert. There’s actually a visual design principle at work here, and understanding it helps explain why this combination produces full-remodel-level results while skipping any one of the three falls flat.
The 60-30-10 rule of kitchen design
Professional interior designers use a rough proportional rule when designing any room: roughly 60% of the space is a dominant color, 30% is a secondary color, and 10% is accent. In a kitchen, this typically breaks down as:
- 60% — Cabinetry. The largest visual surface in any kitchen by far.
- 30% — Walls, countertops, flooring (the secondary surfaces).
- 10% — Hardware, fixtures, accent tile, light fixtures (the details).
When you only paint cabinets, you change the 60% — but the 30% and 10% are still telling a different story. New navy cabinets paired with dated peach-toned granite still feel disjointed. The eye reads the conflict immediately, even if you can’t articulate why.
When you also update countertops and backsplash, you reset the 30% to match the new 60%. The whole kitchen finally tells one coherent story. Now add updated hardware (the 10%), and the transformation is total.
What each element does specifically
The cabinets reset the kitchen’s foundation. Painting changes the color of the largest visual surface. Going from honey oak to crisp white doesn’t just change “the color of the cabinets” — it changes the entire light reflectance of the room. White cabinets make a kitchen feel 30% brighter. Dark navy cabinets create drama and depth. Soft greige creates calm and warmth. The choice sets the entire mood.
The countertops modernize the work surface. Even beautifully painted cabinets fight against dated countertops. A 2008 busy granite slab with lots of movement and yellow undertones will visually argue with a clean modern paint job. Replacing countertops with quartz — consistent in pattern, contemporary in palette, low-maintenance in daily use — completes the upgrade. Quartz coordinates more predictably with painted cabinets than natural stone because its color is engineered to specification, not subject to the geological variations that make every granite slab unique (and unpredictable).
The backsplash ties everything together. Without a thoughtful backsplash, you have new cabinets and new counters separated visually by an old wall. A new backsplash bridges the cabinet and countertop colors, creating visual flow between them. Without it, the upgrade feels incomplete; with it, the kitchen reads as fully remodeled.
The backsplash also gives you the opportunity to add character that the cabinets and counters can’t carry. A subway tile in a brick pattern adds visual texture without competing for attention. A bold geometric tile becomes the room’s focal point. A handmade artisan tile adds warmth and craft. The backsplash is where personality enters the kitchen.
Why partial updates fall flat
The most common mistake we see is homeowners doing the project in pieces — painting cabinets one year, then countertops a few years later, then backsplash whenever budget allows. The problem is that each phase looks unfinished until all three are done, and partial projects rarely deliver the satisfaction that pushes people to complete them.
The other problem: paint colors and countertop colors look different in different lighting, in different seasons, and against different surroundings. Choosing all three together — with samples laid out in your actual kitchen, in your actual light — produces a result where everything is coordinated. Choosing them years apart, from memory or photos, produces near-misses.
If budget is the issue, financing the full project at once (we offer 0% promotional plans through Synchrony for qualifying customers) typically beats spreading the work across years.
Choosing Materials: Colors, Finishes & Hardware
Material decisions make or break the final result. The cabinets carry the most visual weight, so the cabinet color choice is the single most consequential decision in the whole project. Here’s how to think through each layer in detail.
Cabinet Colors: Three families and how to choose
Family 1 — Light tones (white, off-white, soft cream).
Light tones are the most popular cabinet color family in 2026 and have been for over a decade. They make kitchens feel larger and brighter, suit the broadest range of home styles, and consistently deliver the strongest resale appeal because they appeal to the widest pool of buyers. The downside: they show fingerprints, dust, and minor wear more readily than darker colors.
Within this family, there’s significant variation:
- True whites (Benjamin Moore Chantilly Lace, Sherwin Williams Pure White) — crisp, modern, cooler-feeling
- Warm whites (Benjamin Moore White Dove, Sherwin Williams Alabaster, Behr Swiss Coffee) — softer, more inviting, easier to live with day-to-day
- Off-whites and creams (Benjamin Moore Simply White, BM Cloud White) — warmer still, very forgiving in homes with warm wood floors or beige tile
The choice between cool, warm, and off-white depends on your kitchen’s lighting, the undertone of your floors and countertops, and personal preference. Cool whites in north-facing kitchens with poor natural light can feel sterile; warm whites in south-facing kitchens with strong sun can feel yellow. We bring samples on-site and test them against your actual light.
Family 2 — Warm neutrals (greige, taupe, mushroom, soft beige).
This family has surged in popularity recently as a balance between the brightness of white and the drama of dark colors. Warm neutrals pair beautifully with brass or matte black hardware, forgive smudges and wear better than white, and create a sense of warmth that pure white can lack.
- Greiges (BM Revere Pewter, BM Edgecomb Gray, SW Agreeable Gray) — grey-beige neutrals, very current
- Taupes (SW Accessible Beige, BM Manchester Tan) — warmer than greige, softer
- Mushrooms and putty tones (Farrow & Ball Elephant’s Breath, BM Sandy Hook Gray) — sophisticated, slightly dustier
Best for: homeowners who find pure white too stark and dark colors too dramatic. Pairs especially well with warm wood floors, brass hardware, and natural stone counters.
Family 3 — Dark and dramatic tones (navy, deep green, charcoal, black).
The dark cabinet trend has gone from niche to mainstream over the last few years, and shows no signs of fading. Dark cabinets make a confident statement, hide wear remarkably well (a major practical advantage), and pair beautifully with lighter countertops and warm metallic hardware for high contrast.
- Navies (BM Hale Navy, BM Newburyport Blue, SW Naval) — the most popular dark cabinet color in 2026
- Deep greens (BM Salamander, BM Hunter Green, F&B Studio Green) — sophisticated, organic, increasingly trendy
- Charcoals (BM Wrought Iron, SW Iron Ore) — softer than black, very modern
- True blacks (BM Black, SW Tricorn Black) — bold, requires good natural light
The classic “two-tone” approach uses lighter cabinets for the perimeter and a dark color on the island only. This delivers the drama of a dark color while keeping the kitchen feeling bright and open — and it’s an extremely popular choice in 2026 design.
Best for: kitchens with good natural light, homeowners who want to make a confident design statement, those who plan to stay in the home long-term (very dark colors are less universally appealing for resale than whites or warm neutrals).
Finish (Sheen): More important than most people realize
The sheen of the paint is just as consequential as the color. The same color in a different sheen looks like a different paint:
- Matte / Flat. No reflection at all. Very modern, very contemporary. Hides imperfections beautifully. Downside: harder to clean and shows fingerprints. Rarely used on cabinets for this reason, though it’s seen on high-end European-style kitchens.
- Eggshell. Very low sheen, soft and warm. Cleans better than matte. Sometimes used for traditional cabinet looks. Less common today.
- Satin. Soft, gentle sheen with subtle reflection. Traditional and inviting. Hides minor imperfections in old cabinet surfaces well. A safe, forgiving choice — and the most common professional choice for cabinet painting.
- Semi-gloss. Noticeable reflection, contemporary feel, easier to wipe clean than satin. Shows surface imperfections more readily — surface prep has to be excellent. The choice for homeowners who want a more modern feel and who are willing to invest in flawless prep.
- High-gloss. Mirror-like reflection. Very modern, dramatic, European. Demands near-perfect surface prep — every dent, dimple, and brush stroke shows. Not forgiving. Best for flat slab modern doors in high-end designs.
Our default recommendation for most kitchens is satin — best balance of look, livability, and forgiveness of minor surface variations. We move toward semi-gloss for very modern aesthetics or where the homeowner specifically wants a more reflective look. We rarely recommend gloss or matte outside of specific design situations.
Hardware: The jewelry of cabinetry
Hardware is one of the highest-leverage details in a cabinet painting project. New hardware on freshly painted cabinets completes the transformation in a way that’s disproportionate to the cost. A few principles:
Style direction:
- Pulls for drawers, knobs for doors is the traditional formula and still works beautifully. Pulls are easier to use on drawers (more leverage), knobs are charming on doors.
- All-pulls (long bar pulls everywhere) is the modern look — clean, consistent, contemporary. Very popular on shaker doors in 2026.
- Cup pulls on drawers create a more traditional or “kitchen” feel; great for warm-neutral or cream cabinets.
- No hardware at all (push-to-open or finger-pull integrated handles) — most modern look, requires either soft-close mechanisms or push hardware, and a more contemporary cabinet style.
Finish:
- Brushed brass / unlacquered brass — the dominant trend in 2026, warm and elegant, pairs beautifully with white, navy, and green cabinets. Develops a beautiful patina over time (a feature, not a bug).
- Matte black — modern, strong, very contemporary. Pairs with almost any cabinet color. Hides fingerprints best of any finish.
- Polished nickel — a more sophisticated alternative to chrome. Slightly warmer, more luxurious, classic.
- Oil-rubbed bronze — warm, traditional, pairs beautifully with warm neutrals and cream cabinets. Slightly less trendy than it was 5 years ago but still strong.
- Brushed / satin nickel — the safe, universal choice. Slightly dating to a contemporary eye but still neutral enough to work.
- Chrome / polished chrome — reads as dated to most current eyes; we don’t usually recommend it for new work.
Mixing metals. Mixing two metals in a kitchen is acceptable and often beautiful — but it should look intentional, not accidental. A common successful combination: brushed brass on cabinet hardware with matte black on the faucet and pendant lights. Avoid mixing more than two metals.
Where to invest: Don’t economize on hardware. Cheap hardware feels cheap in your hand every single day. The difference between $4 builder-grade knobs and $12 quality hardware is invisible from across the room — but very tangible across thousands of daily uses over the next decade.
Coordinating Countertops
If you’re updating countertops alongside cabinet painting, the order of decisions matters. Choose the cabinet color first, then the countertop. Cabinets set the palette; countertops support it. The reverse rarely works — picking countertops first locks you into cabinet colors that match the counter, which is more constraining than the other way around.
For most cabinet color choices, the safest countertop strategy is:
- White or warm neutral cabinets — pair with white quartz with subtle grey veining (Caesarstone Pure White, MSI Calacatta Laza, or similar). Adds visual interest without competition.
- Dark cabinets (navy, charcoal, green) — pair with lighter countertops for essential contrast. White quartz with bold veining works beautifully. Avoid dark counters on dark cabinets unless you want a very moody, statement-driven kitchen.
- Two-tone (white perimeter + dark island) — match the perimeter cabinet color in the counter, or use a slightly different shade for visual variety on the island.
Cost, Timeline & What to Expect
Two questions every homeowner asks first: how much, and how long. Honest answers — not marketing answers.
What drives the cost
Cabinet painting typically costs up to 50% less than a full cabinet replacement. The actual investment depends on a handful of factors:
- Kitchen size — number of cabinet doors and drawers. A typical kitchen has 25–40 doors and drawers. A larger kitchen has more. Each one requires the same number of steps, so the labor scales with count.
- Cabinet condition. Cabinets in excellent condition need less repair work and prep. Cabinets with dents, damaged edges, or worn finish require more filling and sanding.
- Color choice. Dark colors over light cabinets, or bright colors that need to hide a strong underlying tone, may require an additional coat. Some specialty colors (deep navies, certain greens) need stain-blocking primer in addition to standard primer.
- Whether you’re painting all cabinets or doing two-tone. Two-tone (light perimeter, dark island) is roughly the same labor as painting all one color — both colors need full prep and finish coats.
- Hardware approach. Reusing existing hardware costs less than replacing it. New hardware is a meaningful upgrade but adds to total project cost.
- Whether countertops and backsplash are included. Bundling these in the same project saves on overall mobilization, scheduling, and coordination — but obviously adds material and labor.
- Special features. Adding soft-close hinges, new drawer slides, additional shelves, or built-in organization adds to the project but is much cheaper to do during painting than as a separate project later.
We provide free in-home consultations with detailed itemized estimates — no obligation, no pressure. Trying to estimate cabinet painting over the phone leads to bad numbers in both directions, so we always come look at the cabinets in person before quoting.
Timeline: What an actual week looks like
A typical professional cabinet painting project takes about a week from start to finish. Here’s what each day typically looks like:
Day 1 — Setup and prep. Plastic sheeting goes up. Floors get covered. Hardware comes off cabinets, doors come off boxes, everything labeled. Doors transported to the workshop. Cabinet boxes get cleaned and degreased on-site.
Day 2 — Sanding, repair, more prep. All cabinet boxes sanded by hand and with detail sanders. Any repairs filled, sanded smooth. Doors at the workshop go through the same process in parallel. Tack cloth removes dust from everything.
Day 3 — Primer. Cabinet boxes get bonding primer sprayed in place (using portable HVLP equipment with full containment). Doors at the workshop also get primed. Primer cures overnight.
Day 4 — First finish coat + light sanding. First coat of cabinet paint sprayed on both boxes (on-site) and doors (workshop). After it dries, surfaces get a very light sand with fine paper to prepare for the next coat.
Day 5 — Second (and sometimes third) finish coat. Final finish coats applied. Doors stay in the workshop to cure undisturbed.
Day 6 — Cure time. Doors continue curing in a controlled environment. Boxes finish curing on-site. Light work like hardware staging, final touch-ups on boxes.
Day 7 — Reinstallation and walkthrough. Doors come back from the workshop fully cured. Hinges, drawer fronts, hardware all reinstalled. Final inspection. Plastic comes down. Kitchen gets a final cleaning. Walkthrough with the homeowner.
If you’re combining painting with countertops and backsplash
The project extends by 1–2 weeks because of countertop fabrication time (about 1–2 weeks between template and install) and tile installation (1–2 days for tile + 1 day for grout). The full project typically runs 2–3 weeks total, but the kitchen is functional for most of it — only the few days during actual countertop swap and tile work create real disruption.
Daily kitchen function during the project
This is the key practical difference vs a full remodel. During cabinet painting:
- The cabinet boxes remain in place — you can still access most storage
- The sink stays plumbed (we work around it)
- The stove and refrigerator stay in place and functional
- Doors are off temporarily, so cabinet interiors are exposed for a few days, but everything inside still works
- Heavy work hours are typically 8 AM–5 PM, so evenings are normal
Compare that to a full remodel where the kitchen is gutted and unusable for weeks. The lifestyle disruption of cabinet painting is dramatically lower.
Financing options
For projects combining painting with countertops, backsplash, and other upgrades, we offer flexible financing through Synchrony, including promotional plans with 0% interest for up to 18 months for qualifying customers (subject to credit approval). Many homeowners use financing to bundle the full transformation into one coordinated project without delaying any of it — which usually delivers a better result than spreading the work across years.
Should You Paint or Remodel? Let’s Find Out Together.
The honest answer to “should I paint my cabinets or remodel my kitchen?” depends entirely on the kitchen sitting in front of you. The fastest way to know is to have someone experienced look at it — in person, in your actual kitchen, in your actual light.
Adval Construction has completed 500+ projects across the Bay Area, with a 4.9-star rating across verified customer reviews. We’ve painted kitchens that didn’t need a remodel — and we’ve talked homeowners out of painting kitchens that needed something else. The right diagnosis matters more than the sale, and a contractor that’s willing to recommend against their own services is one you can trust on the ones they recommend for.
Our free in-home consultation includes:
- Honest evaluation of your cabinet material, structure, and condition
- Recommendation on whether painting, refinishing, refacing, or full remodeling fits your situation
- Color and finish guidance based on your kitchen’s natural light, layout, and existing elements — with physical samples brought on-site
- Detailed itemized estimate — no obligation, no pressure
- Information on financing options if helpful
- Timeline expectations for your specific project
👉 Request your free in-home consultation
📞 Or call us directly: (925) 278-8726 — available 24/7
Adval Construction Inc · Licensed CSLB 1059130 · Family-owned · Serving the entire Bay Area for 20+ years.
Frequently Asked Questions
How long does professionally painted cabinetry actually last?
When the prep is done correctly and professional-grade cabinet enamels are used, a painted kitchen typically holds up beautifully for 10–15 years before showing meaningful wear. Longevity depends on three factors: prep quality (the foundation of everything), paint quality (cabinet enamels cure harder than wall paint), and daily use (heavy cooking environments wear faster than lightly-used kitchens). Painted cabinets at the 10-year mark from a quality professional job typically just need a touch-up or recoat, not full repainting. DIY paint jobs commonly fail within 1–2 years.
Can I really paint cabinets myself and get professional results?
Realistically, no — at least not in the sense most people mean. The professional process involves industrial-grade degreasers, bonding primers specifically formulated for cabinets, HVLP spray equipment ($500–2,000 for quality units), multi-day cure times in controlled environments, and 12+ separate steps that all matter. DIY kits sold at hardware stores cut every one of these corners. You can paint cabinets DIY and get a result that looks acceptable for a few months. Getting a result that lasts and looks factory-grade is genuinely beyond most homeowner capabilities — not because homeowners aren’t capable, but because the equipment and chemistry required isn’t economically practical to acquire for a single project.
How is cabinet painting different from cabinet refacing?
Cabinet painting keeps your existing doors and drawer fronts and paints them — same shape, new color. Cabinet refacing replaces the doors and drawer fronts entirely with new ones, covers the exposed cabinet box surfaces with matching veneer, and gives you a completely different door style if you want one. Refacing is the right choice if you don’t like your current door style (you have raised-panel oak and want shaker). Painting is the right choice if you like the door shape but want a different color. Refacing costs more than painting but less than full replacement.
Do I need to be out of my home during cabinet painting?
No. You can continue living in the home and using the kitchen throughout most of the project. The cabinet boxes remain in place; only the doors and drawer fronts are removed temporarily to be sprayed in a controlled environment off-site. We seal off work zones with plastic to contain dust and overspray, and most homeowners report that the disruption is far less than they expected. The sink, stove, and refrigerator stay functional throughout.
Can any cabinet color be matched or chosen?
Yes. Professional cabinet painting can match virtually any paint color from major manufacturers — Benjamin Moore, Sherwin Williams, Farrow & Ball, Behr, and others. During the consultation we bring physical samples to test against your actual kitchen light. We can also color-match from a fabric, a tile, a piece of art, or any other reference. The color choice is the most consequential decision in the project, so we spend time getting it right.
Will painting my cabinets hurt resale value?
Done well, professional cabinet painting increases resale value — buyers consistently respond to updated kitchens, and a professionally painted kitchen looks remodeled in listing photos and walkthroughs. Done poorly (visible brush strokes, peeling, yellowing, sticky finish), painted cabinets can hurt resale because buyers see them as a problem to fix or a sign of amateur work elsewhere in the house. This is one of the strongest arguments for hiring a professional rather than DIY: the resale upside of professional painting more than pays for the labor difference.
What if my cabinets are particle board?
It depends on the condition. Quality particle board with a solid intact veneer can be painted, though the result is less durable than with solid wood. Failing particle board — swollen edges, crumbling, water damage, separating layers — cannot be painted reliably because paint can’t fix structural failure. In that case, we’ll recommend cabinet refacing (new doors + veneer over the boxes) or a full kitchen remodel instead. The honest evaluation happens during the in-home consultation — we’ll never recommend painting cabinets that won’t hold the paint.
Can painted cabinets be touched up if they get damaged?
Yes. One of the practical advantages of painted cabinets over factory-finished cabinets is that they can be touched up. If a door gets scratched or chipped years later, we can match the original paint and repair the area, often invisibly. Keep a small sample of the original paint after the project for future touch-ups — we provide this with every job.
What’s the maintenance like for painted cabinets?
Very low. Wipe with a soft cloth and mild soap or a general kitchen cleaner. Avoid abrasive cleaners (scrub pads, ammonia-based cleaners) which can dull the finish over time. Painted cabinets don’t need re-oiling like wood, don’t need sealing like stone, and don’t require any special products. Standard kitchen care is enough.
Do you serve my area in the Bay Area?
We serve the entire Bay Area across 9 counties, including Contra Costa County and Solano County. See our full service map →
Is Adval Construction licensed and insured?
Yes. Adval Construction Inc is fully licensed (CSLB 1059130), bonded, and insured, with warranty coverage on both labor and materials. We’ve served the Bay Area for over 20 years with 500+ completed projects.